Sunday, February 02, 2014

Tourte Milanese - Looks so good!

This looked so good and I will just have to try it! I saw it on the Parsley, Sage, & Sweet Site .


Tourte Milanese - layers of herbed eggs, ham or turkey, cheese and vegetables encased in puff pastry!  A great brunch stunner and easy!


Tourte Milanese
Recipe by Michel Richard
4
 to 8 servings, depending how you slice it

Video of Michel Richard making the Tourte Milanese - Starting at 6:23

1 pound puff pastry, chilled - homemade or store bought.  If using store bought, roll both sheets together for 1 lb, then cut off a 1/4 lb for the top of the torte. Use any scraps to cut out designs for the top, if desired.
For the Eggs
10 large eggs
1 tablespoon chopped fresh chives
1 tablespoon chopped fresh flat-leaf parsley
2 teaspoons snipped fresh tarragon
Salt and freshly ground black pepper to taste
3 tablespoons unsalted butter
Filling
6 large red bell peppers
Salt and freshly ground black pepper to taste
1 1/2 pounds spinach, trimmed and washed
1 tablespoon olive oil
1 tablespoon unsalted butter
2 cloves garlic, peeled and minced
1/4 teaspoon grated nutmeg
3 tablespoons heavy cream (optional)
8 ounces Swiss cheese or Gruyere, thinly sliced
8 ounces smoked or honey ham, thinly sliced
1 large egg beaten with 1 tablespoon water and a pinch of salt
DIRECTIONS:
1. Prepare the pastry: Generously butter an 8 1/2-inch springform pan. Cut off one quarter of the pastry, cover, and set aside. Roll out remaining puff pastry on a lightly floured work surface to a 1/4-inch thick round. Carefully fit the pastry into the pan, pressing to get a smooth fit, leave a 1-inch overhang. Roll out the smaller piece of pastry until it is 1/4 inch thick. Cut out an 8-inch circle of dough for the top of the torte and lift it onto a plate or baking sheet. Cover both the crust and the lid with plastic wrap and refrigerate while you prepare the filling. If using scraps for cut-out designs, like leaves, place the cut-outs on a separate plate, cover with plastiv wrap and chill in fridge along with top and lined springform pan.
2. Make the Eggs: Whisk eggs, herbs, salt and pepper together. Melt the butter in a large skillet over low heat and pour in the eggs. Gently but constantly stir the eggs around in the pan, pulling the eggs that set into the center of the pan. Slide the eggs onto a plate, without mounding them, and cover immediately with plastic wrap. You want a loose, soft scramble since the eggs will be baking for a little over an hour.
3. Roast the peppers: place whole and untrimmed, directly over the flame of a gas burner. As soon as one portion of a peppers skin is charred, turn the pepper. When black and blistered all over, drop into a bowl…cover with plastic wrap and let steam (I throw them all in a paper or large ziplock bag and seal it shut) for about 20 minutes.  Use your fingers to rub off skin – DO NOT rinse under water, you lose flavor.  Cut each pepper once from top to bottom, cut away the stem, open the peppers, and lay them flat. Trim away the inside veins and discard the seeds; season peppers with salt and pepper and set aside, covered, until needed.
Alternatively, lay the peppers on a baking sheet and place them under the broiler, turning them as each side chars   Then continue to skin and seed them as instructed above.
The peppers release a lot of liquid once roasted. Make sure the peppers are dry (blot with paper towels) before adding them to the tourte. I cut up the roasted peppers because sometimes you end up with big or whole pieces pulling out with each forkful.
5. Cook the spinach: in a large quantity of boiling salted water for 1 minute to blanch it. Drain spinach in a colander, rinse with cold water, and press it to extract all of the excess moisture. Heat the oil, butter, and garlic in a large skillet over medium heat. Add blanched spinach and sauté for 3 minutes. Season with salt, pepper, and nutmeg, and add a little heavy cream. Bring quickly to the boil and stir so it mixes with the spinach. Remove the spinach from the skillet with a slotted and set aside.  Once it’s coole, squeeze as much liquid out before adding it to the tourte.
6. Assemble the Torte: Remove the pastry-lined springform pan from the refrigerator and layer the filling ingredients in the following order: (quick tip: Sprinkle a little dry bread crumbs or grated Italian hard cheese on the bottom of the raw crust before adding first layer of scrambled eggs to protect against a soggy bottom crust).
  • half the eggs
  • half the spinach
  • half the ham
  • half the cheese
  • all the roasted peppers, laid flat
Continue layering in reverse order;
  • remaining half of cheese
  • remaining half of ham
  • remaining half of spinach
  • remaining half of eggs
With each layer, make certain that the ingredients are spread to the edge of the pan. Fold the excess crust in over the filling, and brush the rim of crust you’ve created with the egg wash. Center the rolled-out top crust over the torte and gently push the edge of the top crust down into the pan, pressing and sealing the top and bottom crusts along the sides. Brush the top with the egg wash and cut a vent in the center of the crust. Use the point of the knife to etch a design in the top crust, taking care to cut only halfway into the dough. Chill the fully loaded tourte for 30 minutes to 1 hour before baking.
20 minutes prior to baking; position a rack in the lower third of the oven and preheat oven to 350°F.
7. Bake the Torte: Place the torte on a jelly-roll pan, give it another coat of egg wash, and bake it for 1 hour 10 minutes, or until puffed and deeply golden. Remove from the oven and let rest on a rack until it reaches room temperature. Run a blunt knife or offset spatula around the edges of the pan and release the sides.  Let cool for 20 – 30 minutes before cutting.  I let it cool for 1 hour before cutting because it still felt like it would fall apart upon cutting, after 30 minutes.
Please excuse the hideous photos of the spinach layers, below.  The spinach was too dark to get a decent photo of with the artificial light.
Uc5H6E on Make A Gif, Animated Gifs
I’m submitting this recipe to Weekend Potluck #69 and Recipe Sharing Mondays.

Monday, January 27, 2014

Candy Hearts Table Runner Tutorial

Valentine's Day is approaching and I saw this tutorial that looked so pretty and that would be great to make for Valentine's Day. It is from the Farm Wife Journal Blog . 

♥♥♥♥♥♥♥♥♥♥♥♥♥♥♥♥♥♥♥♥♥♥♥♥♥♥♥♥♥♥♥♥♥♥♥♥♥♥♥♥♥♥♥♥♥

Candy Hearts Table Runner Tutorial 

Our kitchen table needed a little brightening up for Valentine's Day. I searched through my fabric stash and found the aqua pieces of Sew Cherry by Lori Holt. I love this fabric!! Then found a few scrap fabrics that coordinated. I love it when I can just shop my stash!
The table runner is made with an uneven nine patch blocks and heart appliqué blocks. This was quick and easy to put together.
Here is a tutorial so you can make a Candy Heart Table Runner too.

Materials
1 1/2 yards of white back ground Fabric
1/2 yard of red fabric for heart and binding
1/2 yard of aqua for uneven nine patch blocks
Scraps of coordinating fabric for heart blocks
Batting (I used scraps. It is so nice to use up those little bits of leftover batting)

From the white background fabric cut:
4- 3 inch strip width of fabric (WOF)
2- 2 1/4 inch strip WOF
5- 6 1/2 inch squares

From aqua cut:
2- 2 1/4 inch strip WOF
1- 3 inch strip WOF

From red cut:
3- 2 1/2 inch strips WOF for binding

From scraps:
Cut five hearts

For the Heart blocks
 Cut a piece of paper 6 1/2 inches square. Fold in half and draw half a heart on the fold. Make sure that you leave enough room for seam allowances. Cut along your drawn shape to make a heart.
 Use your paper heart as a pattern and appliqué your scrap hearts to the center of the white blocks. I used needle turn appliqué.  I traced the heart on to freezer paper then cut it out and ironed it to the right side of my scrap fabric. Shiny side down. Then traced the heart shape into the fabric. Clipping the curves I stitch the hearts to the blocks.
For the Uneven Nine Patch Blocks
For the first strip set sew 2 1/4 inch white strips to both sides of the 3 inch color strip.
 For the second strip set sew 2 1/4 inch aqua strips to both sides of the 3 inch white strip.
From the first strip set cut 5- 3 inch blocks.

From the second strip set cut 10- 2 1/4 inch blocks.

 Sew a 2 1/4 block to either side of the 3 inch block to make an uneven nine patch block. Make 5 uneven nine patch blocks. Should be 6 1/2 inch blocks.
Now alternate the heart blocks and the nine patch blocks so that you have two rows of 5 blocks. Sew together to form rows then sew your rows together.
Add borders. Make your quilt sandwich. I machine stitched in the ditch between all the blocks and in the seams if the uneven nine patch blocks. Then I used floss to stitch around the hearts and in the border.
Add binding.
 All done!! A bright fun Candy Hearts Table Runner!!

Friday, January 24, 2014

First Day Of School Bracelets - this is a keeper!

I know that this is not the first day of school nor is it even close, but I just thought that this was a great idea! I got this from the Tie Dye Diva Patterns Blog .


Monday, January 20, 2014

The Pioneer Woman’s Chili

I have been reading and seeing more and more about the Pioneer Woman's recipes and cookbooks on the internet and newspapers/magazines. So this recipe caught my eye. I used to make my chili with McCormick's chili mix but it seems as if it just isn't as good as it used to be. I am not sure if they changed their recipe of seasonings or my taste buds have changed. This recipe does look like it has the right ingredients to make chili but I am not sure of the corn meal. So I still have to try it.

This is the link where I got the recipe: Crazy Jamie . let me know what you think.
The Pioneer Woman’s Chili


Ingredients:

  • 2 pounds Ground Chuck
  • 1 yellow onion, chopped
  • 3 cloves Garlic, Minced
  • 1 can (29 Ounce) Tomato Sauce
  • 2 cans (10 Ounce) Ro-tel (diced Tomatoes And Chilies) (I did 1 can hot, 1 can original)
  • 1/2 teaspoon Salt
  • 1 teaspoon Ground Oregano
  • 1 Tablespoon Ground Cumin
  • 2 Tablespoons Chili Powder (more To Taste)
  • 1 can (14-ounce) Kidney Beans, Drained And Rinsed
  • 1 can (14-ounce) Pinto Beans, Drained And Rinsed
  • 1/4 cup Regular Corn Meal
  • 1/2 cup Warm Water
  • Grated Extra Sharp Cheddar Cheese

Directions:

  • Brown ground chuck and add onions in a pot over medium high heat. Cook the onions with the meat until meat is browned
  • Then add the garlic and stir in and cook for a few more minutes.
  • Add tomato sauce, Rotel, salt, oregano, cumin, and chili powder.
  • Cover and reduce heat to low.
  • Simmer for 30 minutes.
  • Add drained and rinsed beans.
  • Stir to combine, then cover and simmer for another 20 minutes.
  • Mix corn meal with water, then add to the chili.
  • Stir to combine and simmer for a final 10 to 15 minutes.
  • Serve up in a bowl with cheese, and diced onion if using

Crock-Pot Apple Pie Moonshine

My daughter-in-law gave me this recipe. There is a warning that the longer you store it, the more potent it gets. Also, this is an adult drink! It came from the Crock-Pot Ladies Site . Will you try making it? And if you do, will you drink it?

Crock-Pot Apple Pie Moonshine
Ingredients
1 Gallon Apple Cider
1 Liter Everclear Alcohol
3 Cinnamon Sticks
Instructions
  1. Add Apple Cider and Cinnamon Sticks to crock-pot.
  2. Cook on low for 8 hours.
  3. Turn off crock-pot and allow the cider to cool to room temp.
  4. In a large pan (large enough for a 5 quarts), mix cider and the Everclear Alcohol. If your crock-pot is large enough for this, you can do it there once the cider is cooled.
  5. Pour into 5 Quart Canning Jars (or bottles of your choice) and put lids and rings on.
  6. Let the jars sit in a cool dark place for 30 days to allow the alcohol to take the flavor of the cider.
  7. This is shelf stable and can be kept on the counter, or if you prefer it chilled, in the refrigerator.
  8. NOTE: this is a strong adult beverage. Serving size is one shot glass.

Sunday, January 19, 2014

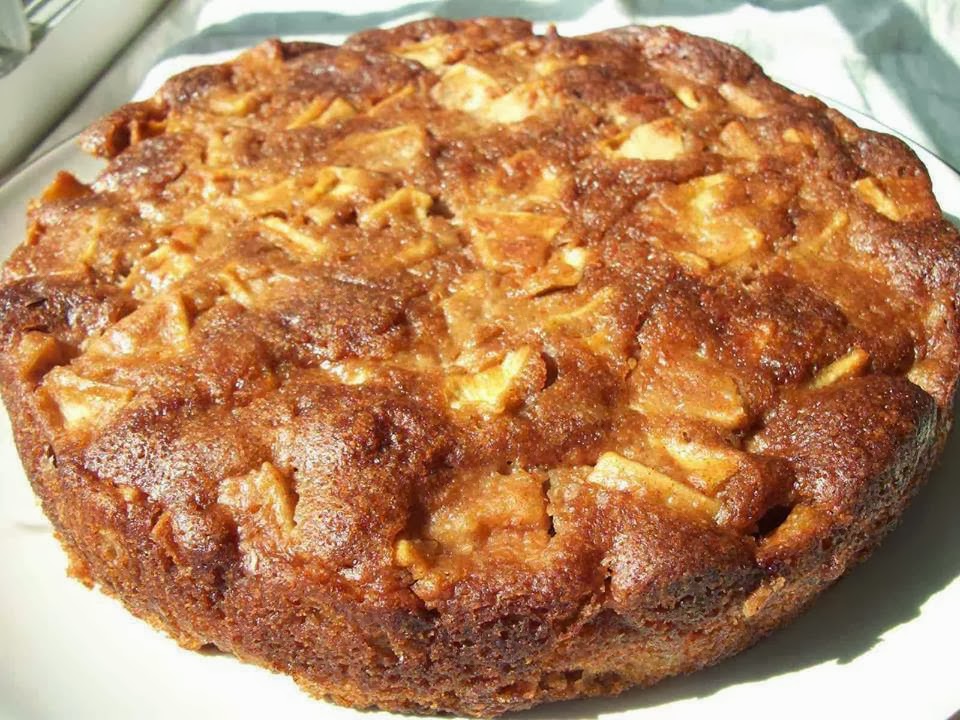
One Bowl Apple Cake


I can just smell it baking! Cinnamon, and apples in a cake tastes so good. I don't care what you put it in, it is delicious! A friend showed me this recipe that was on Gabrieles Skinny Fiber Facebook Page. You can join the group and you will receive inspirations each day. The recipe is inspiring me to go the store and get some apples. See ya! Gotta go!

One Bowl Apple Cake

One Bowl Apple Cake - This cake is so moist and rich and just perfect for this time of year. (and easy to make!)
Ingredients:
2 eggs
1 3/4 cups sugar
2 heaping teaspoons cinnamon
1/2 cup oil
6 medium Gala or Fuji or Honey Crisp apples
2 cups flour
2 teaspoons baking soda

Directions:
Preheat oven to 350°. In a large bowl, mix the eggs, sugar, cinnamon and oil. Peel and slice the apples and add to mixture in bowl (coating as you go to keep apples from turning brown.) Mix together the baking soda and flour and add to the ingredients in the bowl. Mix well (best with a fork) until all of the flour is absorbed by the wet ingredients. Pour mixture into a greased one 9x13 or two 9″ round pans. Bake for approximately 55 minutes.

Join us for healthier alternatives and weight loss support at Gabriele's Skinny Friends Facebook Group.

Saturday, January 18, 2014

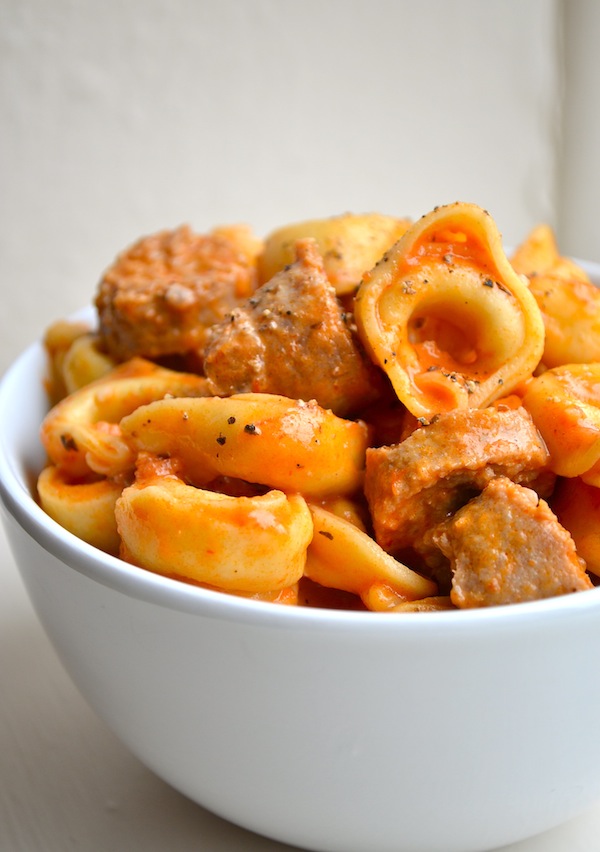
ONE PAN, 20 MINUTE, SAUSAGE TORTELLINI - Ummmm, good...


Now this is an easy recipe and looks so delicious! It would be great for a week night dinner. I got this from the Rachel Schultz Site . The tomato sauce that is in the recipe should be jarred spaghetti sauce. I read her notes and their were other people that questioned the sauce. So get you tortellini, your sausage, and make some sauce - 20 minutes! Then you can eat!

ONE PAN, 20 MINUTE, SAUSAGE TORTELLINI from Rachel Schultz


ONE PAN, 20 MINUTE, SAUSAGE TORTELLINI
Author: 
Serves: 3-4
Ingredients
  • 2 tablespoons olive oil
  • 2 pounds sausage
  • 2 cloves garlic, minced
  • 1 cup vegetable broth
  • 2 cups tomato sauce
  • ½ cup heavy cream
  • 18 ounces tortellini
  • Salt & pepper
Instructions
  1. Heat oil in a large skillet and cook sausages about 5-7 minutes, until sausages are browned throughout.
  2. Add garlic and heat for 30 seconds.
  3. Remove sausages from skillet and slice into bit-size pieces.
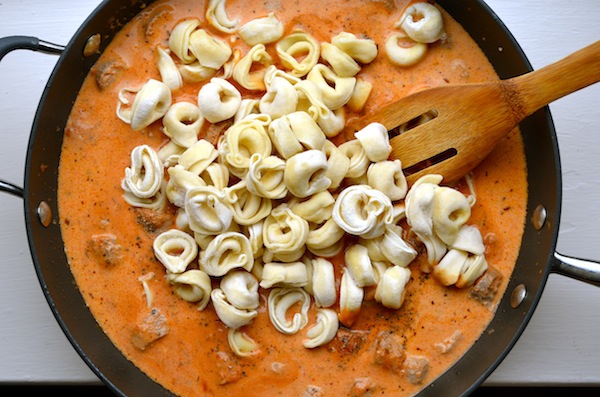
  4. Return sausages to pan along with broth, tomato sauce, cream, and tortellini.
  5. Season with salt & pepper.
  6. Cover and simmer for 12 minutes.

ONE PAN, 20 MINUTE, SAUSAGE TORTELLINI from Rachel Schultz

Friday, January 17, 2014

Salad on a Jar - Delicious!

Well,  I tried this and the salad was just great! I put the salad dressing in the bottom and then added sliced red onions, sunflower kernels (couldn't find just the seeds), sliced grape tomatoes, sliced cucumbers, sliced hard boiled eggs, sliced radishes, and ending with the Spring salad mix (a container that I bought at Walmart) at the top. I used wide mouth quart Ball jars because that is all I could get. I made 4 jars of salad and ate 1 the next day. My Husband also ate 1. Initially, he was not a happy camper about me putting the salad in jars, but after he started eating the salad, he really liked it. 

I got the recipe from the Titan Outlet Store site. Never thought that they would have a recipe on their page. You have to try this! It is really good!

Farm Recipe: Salad in a Jar

Posted on: March 6th, 2013 by titanoutlet No Comments
 Salad in a Jar – Ingenious!
I’ve always loved salads, and especially love the salad bars where you can choose from a wide array of makings.  My biggest problem at home though, is actually putting the salad together once I have all of the fixings.  I don’t know why that is – perhaps my subconscious is telling me that digging in my refrigerator for the various ingredients is a lot more work than simply selecting them from choices already put in front of me at a restaurant.  Anyway, when I saw this idea that someone shared on Facebook I was quite excited, and I was determined to see if this method really works.  I added extra items based on my personal preferences, and spent most of an afternoon chopping red onions, green pepper, cucumber and carrots.  I also included one boiled egg per jar and added some bacon bits.   While this part of the preparation seemed rather time-consuming, once it was done the assembly process went quite quickly and it brought me great pleasure to see my refrigerator filled with premade salads.   The amount of dressing is up to you.  I started with ¼ cup and will see if that suits me.  I used the least expensive method of sealing, spending under $5 for the Zip-Loc hand vacuum.
I calculated an estimated calorie count for one of these salads, and was found that they were approximately 550 calories (the dressing and boiled egg carrying the majority).  I’m anxious to see how effective the vacuum process is.  If this works well, I hope to create a new habit towards eating healthier!
Salad in a Jar
THE ARRANGEMENT from BOTTOM to TOP:
Dressing
Shredded carrots
Cherry tomatoes
Sunflower seeds
Hard boiled eggs
Baby spinach

DIRECTIONS:
  1. Arrange ingredients in a large Mason jar
  2. Store in fridge for up to a week
  3. When ready to eat: shake jar, place on plate, and eat!

You can make any arrangement you want (add red onion, cucumbers, radishes, peppers, etc.).  Always remember to put the dressing at the bottom and the lettuce at the top – a MUST.

Tuesday, January 14, 2014

Red Velvet Truffles

I love Red Velvet Cake. My son makes it for Christmas. He uses a recipe my Aunt used many years ago. I came across this recipe for Red Velvet Truffles. This really sounds delicious and easy. The recipe is from the Dessert For Two  site. I think I will give it a try! How about you?

http://www.dessertfortwo.com/wp-content/uploads/2012/12/DessertForTwoRedVelvetTruffles1.jpg


Red Velvet Truffles
Makes 10 truffles* The first part of this recipe is identical to my recipe for red velvet cupcakes for two.

Ingredients

  • ⅓ cup plus 1 tablespoon flour
  • 2 teaspoons unsweetened cocoa powder
  • ⅛ teaspoon baking soda
  • ⅛ teaspoon salt
  • ¼ cup canola oil
  • ¼ cup sugar
  • 2 tablespoons buttermilk
  • 1 egg white
  • 1 teaspoon red food coloring
  • ¼ teaspoon vanilla extract
  • ⅛ teaspoon white vinegar
  • 3 ounces cream cheese, softened
  • ½ cup powdered sugar
  • 12 oz. almond bark (or white chocolate), for coating

Instructions

In a cupcake tin, place 4 cupcake liners on the outside edge.


In a medium bowl, sift together the flour, baking soda, salt and cocoa powder.


In another bowl, beat together the canola oil, sugar, buttermilk, egg white, red dye, vinegar, and vanilla using an electric mixer.


Slowly add the dry ingredients to the wet ingredients, mixing all the while. 


Divide the batter between the four cupcake liners and bake at 350° for 20-22 minutes until a cake tester comes out clean. Let cool completely on a wire rack.

When cool, crumble the cupcakes into crumbs. In a bowl, mix the softened cream cheese and powdered sugar. Add the crumbs and stir very well. 


Scoop a heaping tablespoon of the mixture into your hands and then roll into balls. Place the balls on a plate and refrigerate at least 4 hours.

To make the coating, chop the almond bark into 1″ chunks and place in a bowl. Heat on medium power in the microwave in 30-second intervals, stirring in between until melted. Dip each ball into the coating quickly, using a fork to turn, then let them dry on a piece of wax paper. Can be made 3 days ahead of time and stored in the fridge. 


Notes
*Recipe is easily doubled and baked in a 6″ round cake pan.


Friday, January 10, 2014

Peachy Cream Cheese Pie

I saw this on Pinterest today and followed the pages to finally get the recipe on the Recipe.Com site. It looks delicious and so easy. Gotta try it!

peachy cream cheese pie


This easy pie with its no-bake cream cheese filling makes a refreshing summertime dessert.


Recipe from

Servings: 8
Prep Time: 20 mins

ingredients

  • 3/4 cup vanilla wafer crumbs (about 17 cookies)
  • 2/3 cup ground toasted almonds
  • 1 tablespoon sugar
  • 1/3 cup margarine or butter, melted
  • 1 8 ounce package reduced-fat cream cheese (Neufchatel), softened
  • 1/4 cup sugar
  • 2 tablespoons frozen orange juice concentrate, thawed
  • 1 cup frozen whipped dessert topping, thawed
  • 3 cups peeled, sliced peaches
  • 1/4 cup orange marmalade
  • Raspberries (optional)

directions

In a medium bowl stir together wafer crumbs, toasted almonds, and the 1 tablespoon sugar; add melted margarine. Toss to mix well. Spread mixture evenly in a 9-inch pie plate, pressing onto bottom and up the sides of the pie plate. Bake in a 375 degree F. oven for 4 to 5 minutes or until edges are light brown. Cool completely on a wire rack.

Meanwhile, in a medium bowl beat cream cheese, 1/4 cup sugar, and orange juice concentrate with an electric mixer on medium speed until smooth. Fold in whipped topping. Spread over cooled crust. Cover surface with plastic wrap and chill at least 1 hour or up to 24 hours. Just before serving, arrange peach slices over filling. In a small saucepan, heat and stir the orange marmalade just until melted; brush onto peaches. If desired, garnish with raspberries. Makes 8 servings.

nutrition information

Per Serving: cal. (kcal) 389, Fat, total (g) 26, chol. (mg) 22, sat. fat (g) 10, carb. (g) 37, fiber (g) 2, pro. (g) 5, vit. A (RE) 237, vit. C (mg) 12, sodium (mg) 235, calcium (mg) 30, iron (mg) 1, Percent Daily Values are based on a 2,000