Today it is icy and snowy outside and I plan to make some mug rugs. A mug rug is a little larger than a coaster and can be used for mugs, snacks, a spoon, or even plants. I have seen so many cute ones and have found one with a tutorial. My plan is to start with that one and then work my way onto making others. This the link for the video http://youtu.be/Z43J5S45FNQ or you can just click on the arrow in the picture.
Showing posts with label sewing. Show all posts
Showing posts with label sewing. Show all posts
Wednesday, February 05, 2014
Monday, January 27, 2014
Candy Hearts Table Runner Tutorial
Valentine's Day is approaching and I saw this tutorial that looked so pretty and that would be great to make for Valentine's Day. It is from the Farm Wife Journal Blog .
♥♥♥♥♥♥♥♥♥♥♥♥♥♥♥♥♥♥♥♥♥♥♥♥♥♥♥♥♥♥♥♥♥♥♥♥♥♥♥♥♥♥♥♥♥
 Our kitchen table needed a little brightening up for Valentine's Day. I searched through my fabric stash and found the aqua pieces of Sew Cherry by Lori Holt. I love this fabric!! Then found a few scrap fabrics that coordinated. I love it when I can just shop my stash!
 The table runner is made with an uneven nine patch blocks and heart appliqué blocks. This was quick and easy to put together.
 Here is a tutorial so you can make a Candy Heart Table Runner too.
Materials
1 1/2 yards of white back ground Fabric
1/2 yard of red fabric for heart and binding
1/2 yard of aqua for uneven nine patch blocks
Scraps of coordinating fabric for heart blocks
Batting (I used scraps. It is so nice to use up those little bits of leftover batting)
From the white background fabric cut:
4- 3 inch strip width of fabric (WOF)
2- 2 1/4 inch strip WOF
5- 6 1/2 inch squares
From aqua cut:
2- 2 1/4 inch strip WOF
1- 3 inch strip WOF
From red cut:
3- 2 1/2 inch strips WOF for binding
From scraps:
Cut five hearts
For the Heart blocks
 Cut a piece of paper 6 1/2 inches square. Fold in half and draw half a heart on the fold. Make sure that you leave enough room for seam allowances. Cut along your drawn shape to make a heart.
 Use your paper heart as a pattern and appliqué your scrap hearts to the center of the white blocks. I used needle turn appliqué. I traced the heart on to freezer paper then cut it out and ironed it to the right side of my scrap fabric. Shiny side down. Then traced the heart shape into the fabric. Clipping the curves I stitch the hearts to the blocks.
 For the Uneven Nine Patch Blocks
For the first strip set sew 2 1/4 inch white strips to both sides of the 3 inch color strip.
 For the second strip set sew 2 1/4 inch aqua strips to both sides of the 3 inch white strip.
From the first strip set cut 5- 3 inch blocks.
From the second strip set cut 10- 2 1/4 inch blocks.
 Sew a 2 1/4 block to either side of the 3 inch block to make an uneven nine patch block. Make 5 uneven nine patch blocks. Should be 6 1/2 inch blocks.
 Now alternate the heart blocks and the nine patch blocks so that you have two rows of 5 blocks. Sew together to form rows then sew your rows together.
 Add borders. Make your quilt sandwich. I machine stitched in the ditch between all the blocks and in the seams if the uneven nine patch blocks. Then I used floss to stitch around the hearts and in the border.


♥♥♥♥♥♥♥♥♥♥♥♥♥♥♥♥♥♥♥♥♥♥♥♥♥♥♥♥♥♥♥♥♥♥♥♥♥♥♥♥♥♥♥♥♥
Candy Hearts Table Runner Tutorial


Materials
1 1/2 yards of white back ground Fabric
1/2 yard of red fabric for heart and binding
1/2 yard of aqua for uneven nine patch blocks
Scraps of coordinating fabric for heart blocks
Batting (I used scraps. It is so nice to use up those little bits of leftover batting)
From the white background fabric cut:
4- 3 inch strip width of fabric (WOF)
2- 2 1/4 inch strip WOF
5- 6 1/2 inch squares
From aqua cut:
2- 2 1/4 inch strip WOF
1- 3 inch strip WOF
From red cut:
3- 2 1/2 inch strips WOF for binding
From scraps:
Cut five hearts
For the Heart blocks


For the first strip set sew 2 1/4 inch white strips to both sides of the 3 inch color strip.

From the first strip set cut 5- 3 inch blocks.
From the second strip set cut 10- 2 1/4 inch blocks.


Add binding.

All done!! A bright fun Candy Hearts Table Runner!!
Wednesday, February 06, 2013
Baby Shower Gifts
Hi! I have been busy making some baby shower gifts. The shower is this Sunday and I hopefully, will be done by then.
This is the first one:
 At first, I thought that the mother and father were not going to find out what the baby's sex would be, so I bought some fabric that could be for a boy or a girl. I put a backing and batting on it and then proceeded to hand quilt some of the the lines going up & down and side to side. I didn't do them all because I just wanted it quilted enough to hold the batting in place. On the back, I put 2 fat quarters (1-yellow and 1-green) together and sewed it on with batting. Hope she likes it!
I will post the 2nd one in a seperate post
.
This is the first one:

I will post the 2nd one in a seperate post
.
Sunday, January 20, 2013
New Grandbaby’s Blanket

This is a baby blanket I made for our new granddaughter, Norah. She was born on 1/14 and is just a cutie!
Tuesday, April 24, 2012
Still busy...
Last year I had bought some ABC panels that I was going to make wall hangings for my granddaughters. Today I got up and decided I would make one for my daughter. She does daycare in her house and this would help the children to learn their ABCs. So I used one panel and put borders on it with bright colors (I like bright colors!), added batting, and fabric for the back. Voila! (that's French), here it is:


I have been busy.....
Hi! I have been busy doing some of the projects that I previously posted. I made another chalkboard placemat for one of my granddaughters. The colors are brighter and it shows up better. The black chalk fabric had to be primed first and that is why it looks hazy. Priming consists of rubbing chalk on it. Here is the link for directions: We All Sew .


The next thing that I did was finally sew a zippered bag. I have always been scared to death to sew zippers. I guess you could call me a zipperlockhead! I saw this on tutorial on Pinterest and finally tried it. The pinners said it was a good tutorial and was easy. It even has a lining! I need to do another one because this one was my first. It turned out OK but I learned a lot and thought of various modifications. Hope you like it. Here is the link for the tutorial Zipper Lined Pouch Tutorial


The last thing that I tried was modifying the lemon bar recipe. I used strawberry pie filling instead of the lemon. The recipe is easy - 2 ingredients - angel food cake and pie filling. It is just so good!!! I haven't decided which one I like better. Future bars could be cherry, blueberry, and apple. Here is a link for the directions:2 Ingredient Lemon Bars

Thursday, April 12, 2012
Vintage Baby Quilt
Vintage Baby Quilt by YoYo Mama.

I saw this easy baby quilt on the Ingrid Barlow Site and thought "Well, that's a great idea!". I am always looking for an easy way to do things. I also thought that maybe I could just put appliques on it. So many ideas - so little time!
This is what Ingrid had to say: "You simply place your little squares on top of another piece of fabric + batting + backing, and you sew down the edges. Throw it in the wash and poof! There you have it. This is a good one for all you wanna be quilters. No piecing involved!".
Tuesday, April 03, 2012
FLORIANI HEAT N SHRINK AND FREE-MOTION QUILTING
\
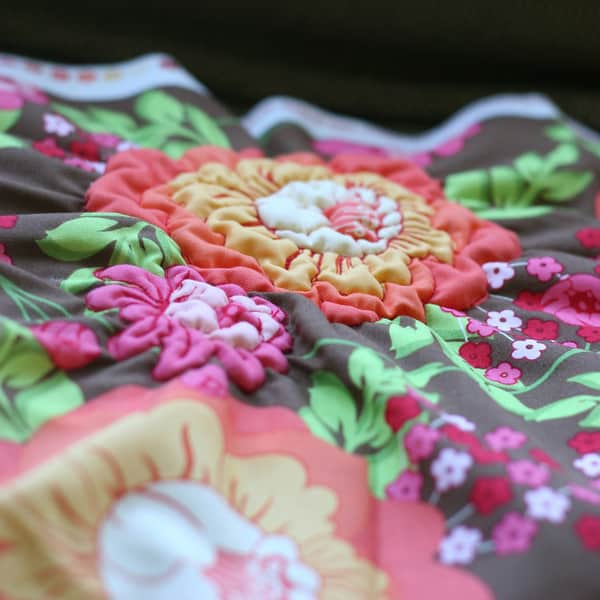
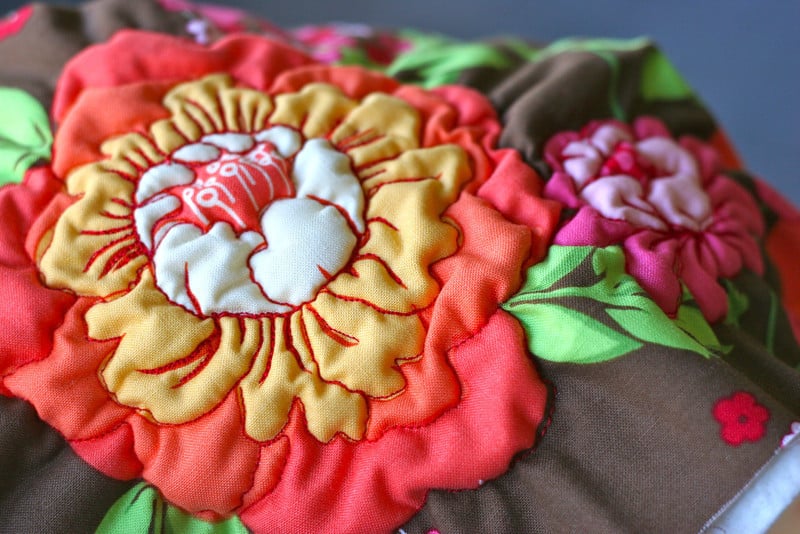
This is so neat! You take a fabric that has flowers or any shape that you want to make puffy. You will use Floriani Heat N Shrink with some batting and sew the lines of the flower. Then you you steam it and it puckers up! The uses are endless - applique on a wall hanging, quilt, purse, or you can do the entire piece of flowered fabric and use it to make a child's dress or nightgown.
The directions come from the Prudent Baby site and they are very clear to understand. This should be easy to make.
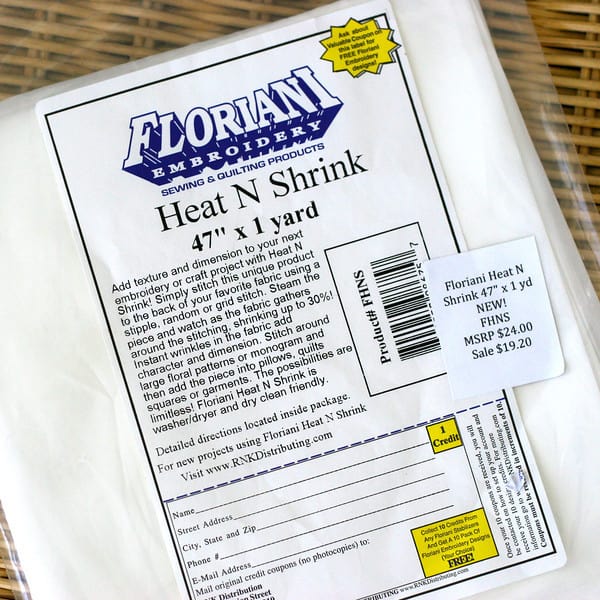
Above is the Heat N Shrink that was used and although a little pricey, it will last you for many designs. The site has additional pictures that you can see the difference in flowers that this method is used on and other flat flowers.
Below is some of the directions that is on the site:
- I cut a square the size of the large flower in my Sandi Henderson Fabric. Then I layered a square of low-loft batting in-between the Heat N Shrink and the back of the fabric, pinning in place.(The batting is optional but does add a nice puff to the petals.)
- Next I attached my quilting foot and lowered my feed dogs so I could try some free-motion quilting around the edge of the flower. Then just stitch along every line of the design. It takes a little practice, mostly you have to remember to move your fabric by hand.
- Since your fabric will be all bunchy later, it doesn’t have to be perfect.
- You can stitch lines, grids, dots or any design
Thursday, March 29, 2012
Ruffled Yellow Felt Pillow
I saw these just beautiful pillows on the Better Homes and Gardens site and just fell in love with them. I will have to make some of these! The colors in the picture seem so Springy but I am not sure that it will work with my furniture. Maybe I will try some different colors. The following sewing instructions are for one pillow. If you go to the Better Homes and Gardens link, the other pillow instructions are there.

Crafts Supplies:
- Felt (yellow)
- 3/8-inch-wide velvet ribbon (green)
- Fiberfill
- Cut a strip of felt 9 inches wide and 18 inches long and hand-stitch two parallel lines close together through the center of the strip. Pull on the ends of each thread so felt strip gathers into a ruffle.
- Make a 6-inch-wide ruffle in the same manner. Machine-stitch the 6-inch ruffle in the middle of the larger ruffle.
- Cut two 12-inch squares from felt.
- Machine-stitch the double ruffle in the center of one square.
- Pin a piece of velvet ribbon in the center of the double ruffle.
- Place the squares right sides together and machine-stitch around edges, leaving a small opening along one edge for turning. Make sure you catch the ends of the velvet ribbon in the seams.
- Turn right side out and stuff with fiberfill. Hand-stitch the opening closed.
Thursday, March 15, 2012
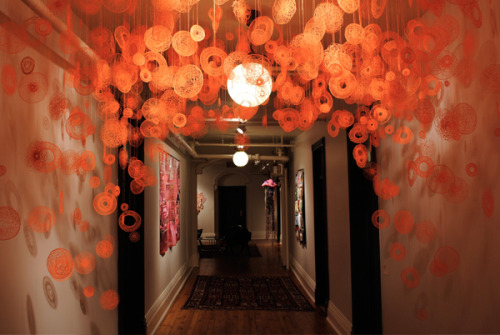
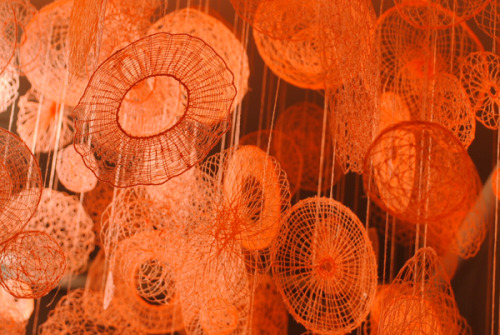
Drawing made out of thread by Amanda McCavour
Here is another drawing made from thread on fabric that disappears in water. This just amazes me! Amanda McCavour is definitely artistic! What do you think?
farewell-kingdom:
farewell-kingdom:
Drawing made out of thread by Amanda McCavour
Wednesday, February 29, 2012
Cute Tote Tutorial


Today I found a tote tutorial that is so cute! It is on a blog that is written in German but you can use the “translate” option on Google to see the instructions in English.
Here is the link: http://geliebteszuhause.blogspot.com/2011/06/anleitung-genahte-einkaufstasche.html
Tuesday, February 28, 2012
Fabric Houses Tutorial

I saw one of these dollhouses on Pinterest and thought it was so cute. I have added the link for the tutorial so you can make them yourself . This would make a nice Easter gift for a child or even a birthday gift. The pictures show some houses or barns that be for a boy or a girl.
I am planning to try it, too. It looks like so much fun! I may just make them for my granddaughters.
http://uklassinus.blogspot.com/2008/08/fabric-dollhouse-tutorial.html


Tuesday, February 21, 2012
Pillowcase Nightgowns


Friday, February 10, 2012
Button Flowers


These are from http://www.flickr.com/photos/greenkitchen/with/102693686/
Tuesday, February 07, 2012
Chalk Board Placemats


You can get directions at http://weallsew.com/weallsew/files/2011/08/ChalkboardPlacemat081111.pdf
Monday, January 23, 2012
Summer dresses for girls
This is such a great idea! Just take a pillow case and make a summer dress for a little girl. Here are the directions http://www.dressagirlaroundtheworld.com/pillowcasedresspattern.htm Send me some pictures of what you made.
Here are some pictures:


Here are some pictures:
Saturday, November 19, 2011
Quilting blogs
I have been looking at quilting sites and blogs and I have found a great blog! Her blog is http://quiltworld2.blogspot.com/ and her name is Ulla. She is from Finland. Her work is beautiful and so well done!. Take a look at her craftsmanship and let me know what you think. The lady has so much talent!
Here are some of her creations:


Here are some of her creations:

Saturday, July 03, 2010
July 4th weekend
Well, it is July 4th weekend and here I am with nothing special to do. I think I will do some sewing. Maybe make a quilt. I have some sun bonnet squares and may just put them together in a quilt. My sewing machine is a Bernina and I am still getting used to it. So far it is pretty neat! It does all kinds of things and is a big help in sewing anything!
Sunday, June 14, 2009
Got an embroidery sewing machine!
I purchased a Brother embroidery sewing machine from WalMart. I had to buy some embroidery thread and actually embroidered a butterfly yesterday. Once I got the hang of it, it was easy. Now I need to find out how I can put it on a small t-shirt without sewing through the back of the t-shirt.
Monday, June 08, 2009
Looking for an embroidery sewing machine that is right for me
I have been searching Ebay and the net for embroidery sewing machines. I have went to 2 Bernina stores and one Brother store. Some of them are so expensive. Sometimes I am not even sure I want to get one then I think about the things I could make for the grandchildren, and I want one.
Subscribe to:
Posts (Atom)