Wednesday, December 04, 2013

Candy Cane Blossoms

Here is a cookie that I will be making for Christmas. It looks so good and is different from the usual blossom cookie. I saw it on the Baked Perfection Blog . Can't wait until I can taste these delicious looking cookies!

Candy Cane Blossoms
recipe from Hershey's

1 bag Hershey;s Kisses brand Candy Cane Kisses
1/2 cup butter, softened
1 cup granulated sugar
1 1/2 teaspoons vanilla extract
1 egg
2 cups all purpose flour
1/4 teaspoon salt
1/4 teaspoon baking soda
2 tablespoons milk
Red and Green colored sugar

Preheat over to 350 degrees Fahrenheit. Remove wrappers from candies (approx. 35)

Beat butter, sugar, vanilla, and egg in large bowl until well blended. Stir together flour, baking soda and salt; add alternatively with milk to butter mixture, beating until well blended.

Shape dough into 1 inch balls. Roll in red and/or green colored sugar. Place on ungreased cookie sheet.

Bake 8 - 1o minutes or until edges are lightly browned and cookies is set. Remove from oven; cool 2 to 3 minutes. Press candy piece into center of each cookie. Remove from cookie sheet to wire rack. Cool completely. Yields approximately 35 cookies.


More Sharing ServicesShare | Share on linkedin Share on print Share on facebook Share on twitter Posted by Risa at 4:27 PM

Friday, November 22, 2013

Cute Dolls From Socks

Aren't these dolls cute? I think that they are adorable!I saw these on My Handmade Toys Blog and thought "Now this should be easy!". What do you think? They could be given for Christmas presents or baby shower presents or just to be displayed in your house. Come on, you know you want to try it!


Dolls from socks


It is required to you:

Bright sock
Fabric slice
Scissors
Thread with a needle
Cotton wool or synthetic winterizer for tamping
Small beads or buttons
Pink pencil, ribbons for dressing

 
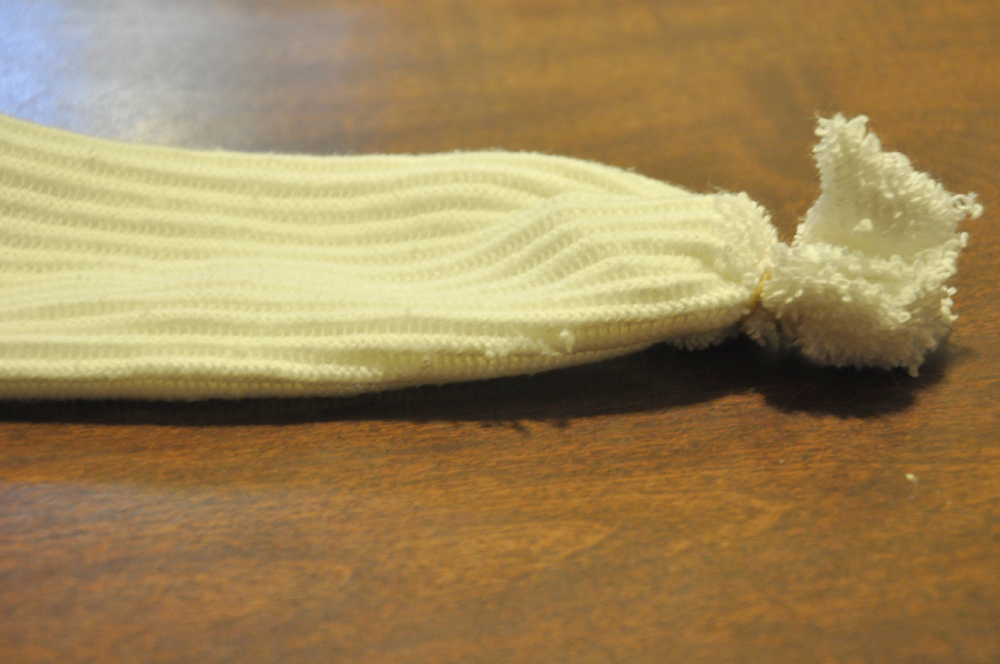
The sock needs to be cut how it is shown on a picture.

To make a marking for handles and doll legs.


To fill a body of a doll cotton wool or a synthetic winterizer. To stitch handles and legs a seam “forward a needle” on to lines.


To cut out from a fabric a circle. To sheathe its edges a seam “forward a needle”. To fill cotton wool or a synthetic winterizer, to tighten a thread. To sew eyes.

Ready head to sew to a doll body. Of the remained top part of a sock to make a hat. To draw cheeks. The doll is ready.


The child is happy! The group of dolls is filled up:)

Monday, November 18, 2013

Christmas Decorations From Used Plastic Bottles

 I am always looking for recycling ideas from Used items. This is a great one and it is easy. It came from the Cresce bene sight which is Italian. Google has translated it. Anyway, it looks very easy. With a little gliiter and glue, you will become an artist!


Christmas tree decorations


 Chores Christmas for Kids: Christmas tree Needlework children's Christmas: Christmas Tree

Decorate your Christmas tree in 4 easy steps!
Materials
Instructions

A chore fast and nice, to create together with your children to decorate your tree Christmas !

How-to:

1. Retrieve plastic bottles of different colors.

2. Cut the bottom of the bottles and throw everything else.

3. Decorate each piece according to your imagination.

4. Pierce at the top of each piece and insert the colored ribbon.


Sunday, November 17, 2013

Cute Snowmen And So Easy To Make!

I am always looking for do it yourself things that are easy to make and are cute. Well, I just saw these cute snowmen on the Darkroom And Dearly Blog . I am definitely going to try these. The instructions are easy and they only take 10 minutes!

Snock Snowman

For this craft, you'll need a pair of old socks that are crew length, or longer. I went through Tanner's bag o' socks in our closet for my set. Don't worry, he'll never miss them -- he owns something like 10,000 pairs of socks, but insists on wearing shorts and flip-flops 365 days a year. Boys...
First, cut off the top of the sock from the foot.
Turn the sock inside out and attach a rubber band tightly to the top of the sock. Then turn the sock right-side out again.
Fill the sock with rice. Make sure to pack it down as you go so the sock gets a nice round base.
Rubber band the top of the sock closed and put another rubber band 3/4 of the way to the top for the head of your snowman.
Now, decorate! Tie a scarf around your snowman's neck and add eyes, nose, and buttons. I used map pins for my eyes. Unfortunately, I didn't have any black ones, so I colored white ones with sharpie and stuck them in.
Use the toe of your cut socks to fashion a stocking cap. Or you could use colored argyle socks to create hats and sweaters for your snowman, as seen at {then she made}.
You can either sew or glue on your buttons, and add embellishments - twine, bows, ribbons, etc - as needed.

This is such a quick and easy craft - 10 minutes tops - that it would be simple to create a whole family of snowmen for your mantle!

Saturday, November 16, 2013

Warm Breakfast Waiting For You To Eat In The Morning - And It Tastes Just Like Apple Pie!

I just love apple pie but don't love all the calories! As the temperatures are getting colder and I started looking for oatmeal recipe, I found one that is a keeper!!! 

Through Pinterest, I came upon this Apple Pie Breakfast. You put it in a slow cooker the night before (7 to 8 hours on low) and Voila! It is sitting there the next morning just waiting for you to eat! It comes from the Cooking With Jax Blog . I did make a slight change - I added some brown sugar. And I always eat my oatmeal with some milk in it. That's how I ate it from when I was a little girl. And that is many years ago ;=).

 You just have to try it!


Steel cut oats are one of my favourite breakfast foods. Once cooked, this recipe keeps very well in the fridge for a couple of days. My husband and I usually eat for three mornings in a row when I make this recipe.

Ingredients
- 1 cup of steel cut oats*
- 3 diced apples (I use Gala)
- 1 cup apple juice (I use Oasis)
- 3 cups water
- 1/2 tsp cinnamon (optional)

Directions - Slow Cooker


For Best Results: Combine all ingredients in slow cooker and cook for 2-4 hours on high or 4-6 hours on low until it reaches the consistency that you like. Be sure to stir every hour or so.


* You can also cook longer without stirring, but you have to add more water liquid and it does come out a bit mushier. Add an extra cup of liquid for 7-8 hours in the slow cooker.

* It must be steel cut oats when cooked in the slow cooker, as regular oats get very soggy when cooked this way. You can find steel cut oats in your local grocery store (sometimes they are called "irish oats" or "pinhead oats"). If you would really rather use rolled oats, be sure to use the stovetop method below and adjust your liquid/cooking time accordingly.

Tuesday, November 12, 2013

Healthy Spinach Lasagna Rolls

I tried this recipe tonight and it was so good! I did add a little basil to the filling. I saw it on Pinterest and it is on The Girl Who Ate Everything Blog. 

You just have to try it!

Healthy Spinach Lasagna Rolls

Yield: 9 lasagna rolls
Serving Size: 1 roll
Calories per serving: 224 calories; 6 WW Points Plus (see Note)

Ingredients

9 lasagna noodles, cooked 


1 (10 ounce) package frozen chopped spinach, thawed and completely drained 


1 (15 ounce) container fat free ricotta cheese 


1/2 cup grated Parmesan cheese
1 egg
1/2 teaspoon minced garlic
1/2 teaspoon dried Italian seasonings
salt and fresh pepper
 

(optional) 1 chicken breast, cooked and diced
  

32 oz tomato sauce (I used spaghetti sauce) 

9 Tablespoons part skim mozzarella cheese, shredded
 
Instructions

  • Preheat oven to 350°. 
  • Make sure you drain the spinach well. Combine spinach, ricotta, Parmesan cheese, egg, garlic, Italian seasonings, chicken, and salt and pepper in a medium bowl. 
  • Pour about 1 cup sauce on the bottom of a 9 x 13 baking dish.
  • Place a piece of wax paper on the counter and lay out lasagna noodles. Make sure noodles are dry by patting them with a paper towel. 
  • Take 1/3 cup of ricotta mixture and spread evenly over a noodle. Roll carefully and place seam side down onto the baking dish. Repeat with remaining noodles.
  • Ladle sauce over the noodles in the baking dish and top each one with 1 Tablespoon of mozzarella cheese. 
  • Cover baking dish tightly with aluminum foil and bake for 40 minutes, or until cheese melts. 
  • Makes 9 rolls.
  • To serve, ladle a little sauce on the plate and top with lasagna roll.

Notes

Adjust calories and points if you add chicken. adapted from Skinny Taste
Schema/Recipe SEO Data Markup by ZipList Recipe Plugin
2.2

Healthy Spinach Lasagna Rolls
Yield: 9 lasagna rolls
Serving Size: 1 roll
Calories per serving: 224 calories; 6 WW Points Plus (see Note)
Ingredients
  • 9 lasagna noodles, cooked
  • 1 (10 ounce) package frozen chopped spinach, thawed and completely drained
  • 1 (15 ounce) container fat free ricotta cheese
  • 1/2 cup grated Parmesan cheese
  • 1 egg
  • 1/2 teaspoon minced garlic
  • 1/2 teaspoon dried Italian seasonings
  • salt and fresh pepper
  • (optional) 1 chicken breast, cooked and diced
    campaignIcon
  • 32 oz tomato sauce (I used spaghetti sauce)
  • 9 Tablespoons part skim mozzarella cheese, shredded

This season, try a Cheesy Sausage Spread
Instructions
  1. Preheat oven to 350°. Make sure you drain the spinach well. Combine spinach, ricotta, Parmesan cheese, egg, garlic, Italian seasonings, chicken, and salt and pepper in a medium bowl. Pour about 1 cup sauce on the bottom of a 9 x 13 baking dish.
  2. Place a piece of wax paper on the counter and lay out lasagna noodles. Make sure noodles are dry by patting them with a paper towel. Take 1/3 cup of ricotta mixture and spread evenly over a noodle. Roll carefully and place seam side down onto the baking dish. Repeat with remaining noodles.
  3. Ladle sauce over the noodles in the baking dish and top each one with 1 Tablespoon of mozzarella cheese. Cover baking dish tightly with aluminum foil and bake for 40 minutes, or until cheese melts. Makes 9 rolls.
  4. To serve, ladle a little sauce on the plate and top with lasagna roll.
Notes
Adjust calories and points if you add chicken. adapted from Skinny Taste

Read more at http://www.the-girl-who-ate-everything.com/2011/04/spinach-lasagna-rolls.html#chpVQQfLhLo1xv73.99

Thursday, October 03, 2013

Mini Notebooks - what a great gift and they are so cute!


I saw these mini notebooks on the Girl On The Go Blog and thought this is such a great idea! And it is so easy! I knew that I had to share it with all of you! I plan to make these for my granddaughters and one for me. I just love to have something to write on in my purse.

The following was taken from Kellie's Blog:


notebooks 3


I think they are so cute when they are all lined up! I made 18 little books to go in the bags and I once again used the patterns from my Reprodepot Pattern Book. Here are the steps to making a mini notebook for yourself.

notebook 1


First of all, decide what size you want it to be. I made mine 3” x 2.5” when folded so when it’s flat the cover is 3” x 5”. That way, if you use an 8.5” x 11” sheet of paper, you can get 5 out of one sheet. Print and then cut your cover to size. I used cardstock for the cover.

notebook 7

For the pages I used regular computer paper but you could also use graph paper (I later made another one with graph paper) and it is so cute! I just didn’t have enough graph paper on hand to make all the books I needed so I used plain white. You could also used a mixture of papers as long as they are all light weight. Cut the plain paper to the same size (3” x 5”).
notebook 2

Fold all of your sheets of paper and your cover in half. You can already see it looking like a little book. I used 10 sheets of paper per book. My sewing machine couldn’t handle any more than that!notebook 3


For the ribbon place holder, put a small piece of double sided tape onto 
the top of the inside fold of the cover and place one end of the ribbon 
onto it. Then assemble the book again. I cut my ribbon to 4”.

notebook 4

Flatten out your book making sure that everything is lined up correctly and sew a straight stitch along the fold down the center. I used a contrasting thread for fun.

notebook 5

notebook 6


Fold your book again and ta-da! You are done! Aren’t they so cute? I love to carry a little notebook with me in my purse and these are just the right size.
.

Thursday, September 26, 2013

Applesauce Bread - sounds so good!

I received this recipe from a friend, Carolyn Carson, who got it from Cathy Greek. I am going to make it today - yessiree, today! I'll let you know how it turned out.


This is so simple to make and smelled so delicious as it baked!
You probably have all the ingredients already ~ Check it out!


Ingredients

1/2 cup of softened butter
1 large egg
1 1/2 t baking soda
3/4 t nutmeg
1 cup sugar
1 1/2 cups of flour
1 t ground cinnamon
1/2 t kosher salt
1 1/2 cups of applesauce
1 t of pure vanilla extract


Preheat oven to 350 degrees.

In a large bowl, first blend together the butter, egg, & sugar.
Then add the flour, baking soda, spices, & salt.
After it starts to from a crumbly dough, pour in the applesauce and mix together.


I used two small loaf pans, pouring mixture evenly into both.
I sprayed my pans with cooking spray first or you could use parchment paper, depending on the dish you choose to bake them in.

Bake at 350 degrees for about 40 minutes.

Wednesday, September 11, 2013

How To Make Ganache - Haven't you always wanted to know how?

I love cakes that have Ganache icing on them. It just tastes so good! OK - I just love cakes! Although I am a mature woman (will not tell her age unless pressed for it), I have always been apprehensive about making Ganache icing. 

Well guess what! I found a recipe that looks so easy on Little Delights Cakes Blog . Now this does looks easy and I plan to try it. I wonder if you could use peanut butter chips - what do you think?


Here is my favorite ganache recipe:

1 cup heavy whipping cream
3/4 cup semi sweet chocolate chips
2 TBL unsalted butter

 
Place the chocolate chips in a bowl then warm 1 cup heavy whipping cream and 2 tbl butter until you start to see little bubbles on the edges but not to a full boil. You can do this on the stove or in the microwave in increments of 45 seconds, stirring in between. Pour the warm cream over the chocolate chips and let it sit for 5 minutes. Then stir until the chocolate is completely melted, at this point you can add some vanilla to taste if you like.

If you want your cake to keep its glossy look make sure it is the temperature it will stay until served before you pour the ganache over the cake. (Ie: If you need to keep your cake refrigerated make sure the cake is cold when you pour the chocolate on it.)

Sunday, September 08, 2013

Loaded Baked Potato Salad - You will love it!

We go camping a lot with family and friends. Each family contributes food to be shared among the group that we go with. I try to bring something new or different but most importantly, taste great. So a few weeks ago when we went camping at a campground Mountain Creek Campground in Gardners, PA just outside of Gettysburg, PA. Anyway, I was looking through my recipes and Pinterest for that "great" recipe - and I found the Loaded Baked Potato Salad. It was easy to make and everyone just loved it!

I actually got the recipe off of Pinterest and then went to the website, This is My Key West Blog. I did make a small change. I substituted bacon bits in place of the bacon. Here is a picture of the salad and the recipe. Hope you like it!

bacon cheese potato salad  

Fully Loaded Baked Potato Salad

8 medium Russet Potatoes

1 cup sour cream

1/2 cup mayonnaise

1 package of bacon, cooked and crumbled

1 small onion, chopped

Chives, to taste

1 1/2 cups shredded cheddar cheese

Salt and Pepper to taste

1. Wash and cut the potatoes into bite-sized pieces. Cover with water and boil until fork tender, about 20-25 minutes. Do not overcook!

2. Drain and cool the potatoes. I put them in a separate bowl and once they cooled enough I put them in the fridge to cool all the way. This gave them an excellent texture and prevented the dairy ingredients from getting hot or the cheese from melting. If you are serving this salad hot then you don’t need to cool the potatoes, just skip step 2!

3. Mix the mayo and sour cream together in a bowl. Add to the potatoes, then add the onions, chives, and cheese. Salt and pepper to taste – I use a pepper grinder and a sea salt grinder for EVERYTHING so I never know exactly how much of either I put in. I think the taste is far superior to just using regular table salt and pepper.

4. Top with extra shredded cheese and bacon and serve! I think next time I will add chives and we may try serving this warm once as well.