I love French Toast! My daughter made it one year for my birthday - and it was just so good!! So I was on Pinterest and selecting items that interested me. After awhile you get so far away from Pinterest because you just continue to click on links and it takes you to another page or blog. Anyway, I ended up on the Sheldon Rachel Blog site. This recipe looks fairly easy and I think it would taste so great!
French Toast Bake

Last weekend I made a French Toast Bake for a bridal shower brunch. I love this recipe because it is so easy (Fia could do this by herself), economical (most expensive ingredient was the Texas Toast at $2), & oh-so-delicious! The best part is that it is made the day before so there is no fuss on the day you consume it....perfect for a Sunday afternoon or brunch. This food post will be step-by-step as I take you through the entire recipe with me...as I like to make my own tweeks & people get mad at me for not telling them EXACTLY what I did. *My additions to the recipe will be in red*
Before I begin....I must note that I was making a double batch (two 9 x 13 pans) so the pictures have double the ingredients. The recipe listed below is for 1 pan (9 x 13). Happy eating!!
** For those who are not familiar with Texas Toast, it is thickly sliced bread. The slices are about double the thickness of standard sliced bread. For a better description, click here **
Ingredient Checklist
1/2 cup melted butter (1 stick)
1 cup brown sugar
1 loaf Texas toast
4 eggs
1 1/2 cup milk
1 teaspoon vanilla
Powdered sugar for sprinkling
Directions
1. Melt butter in microwave & add brown sugar....stir till mixed.
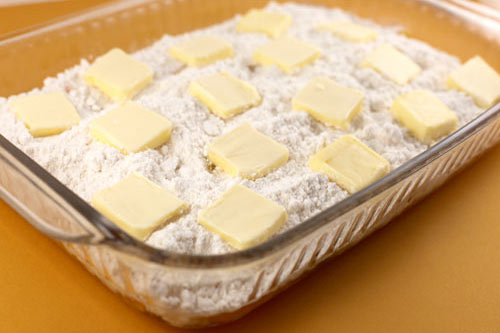
2. Pour butter/sugar mix into bottom of 9 x 13 pan....spread around
3. Beat eggs, milk, & vanilla
4. Lay single layer of Texas Toast in pan
5. Spoon 1/2 of egg mixture on bread layer
6. Add 2nd layer of Texas Toast
7. Spoon on remaining egg mixture
8. Cover & chill in fridge overnight
9. Bake at 350 for 45 minutes (covered for the first 30 minutes)
10. Sprinkle with powdered sugar
11. Serve with warm maple syrup (I don't do the syrup part)
- Crack eggs & get them started (on low)
- Melt butter in microwave
- Add brown sugar & stir together


- Pour mixture into 9 x 13 pan
- Spread evenly to cover bottom of pan


- Add milk & vanilla to egg mixture
- *Add 1 Tablespoon powdered sugar to egg mixture*
- Spread even layer of Texas Toast on butter/sugar layer
- *I cut off the crusts...this is NOT necessary....I just think it looks nicer...it was for a bridal shower*-

- After you have 1 even layer, ladle on 1/2 of egg mixture


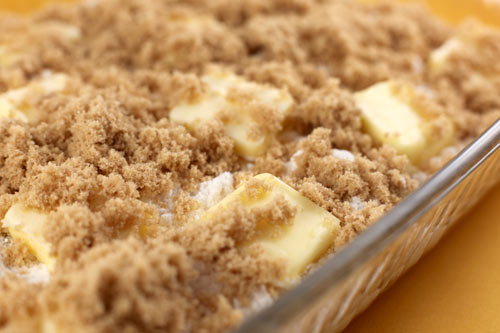
- *Sprinkle brown sugar & cinnamon before next layer*
- Spread second layer of Texas Toast


 - Ladle second half of egg mixture
- *Spread thin layer of butter*


- *Sprinkle lightly with white sugar & cinnamon*
(I think the butter & sugar help give the final product a crusty top....I could easily be wrong....but it sure doesn't hurt the flavor....and since this recipe is far from figure friendly...then why not?)
- Refrigerate overnight

- Bake at 350 for 45 minutes
- Sprinkle with powdered sugar
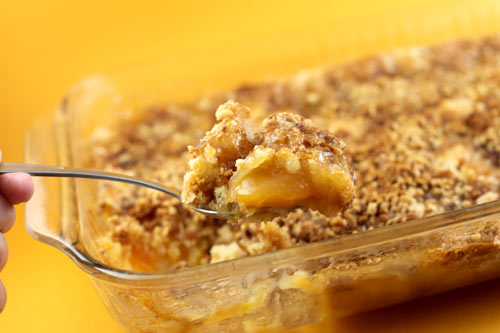
- Top should be crusty, middle should be soft & moist, & bottom is just glorious!

- The recipe calls for eating it with warm maple syrup. I did not do this....it would be way too sweet....instead, I added the Tablespoon of powdered sugar in the egg mixture.
- I personally feel that eating it upside down is the way to go.....that way you don't waste any of the sticky bits of heaven on the plate


French Toast Bake

Last weekend I made a French Toast Bake for a bridal shower brunch. I love this recipe because it is so easy (Fia could do this by herself), economical (most expensive ingredient was the Texas Toast at $2), & oh-so-delicious! The best part is that it is made the day before so there is no fuss on the day you consume it....perfect for a Sunday afternoon or brunch. This food post will be step-by-step as I take you through the entire recipe with me...as I like to make my own tweeks & people get mad at me for not telling them EXACTLY what I did. *My additions to the recipe will be in red*
Before I begin....I must note that I was making a double batch (two 9 x 13 pans) so the pictures have double the ingredients. The recipe listed below is for 1 pan (9 x 13). Happy eating!!
** For those who are not familiar with Texas Toast, it is thickly sliced bread. The slices are about double the thickness of standard sliced bread. For a better description, click here **
Ingredient Checklist
1/2 cup melted butter (1 stick)
1 cup brown sugar
1 loaf Texas toast
4 eggs
1 1/2 cup milk
1 teaspoon vanilla
Powdered sugar for sprinkling
Directions
1. Melt butter in microwave & add brown sugar....stir till mixed.
2. Pour butter/sugar mix into bottom of 9 x 13 pan....spread around
3. Beat eggs, milk, & vanilla
4. Lay single layer of Texas Toast in pan
5. Spoon 1/2 of egg mixture on bread layer
6. Add 2nd layer of Texas Toast
7. Spoon on remaining egg mixture
8. Cover & chill in fridge overnight
9. Bake at 350 for 45 minutes (covered for the first 30 minutes)
10. Sprinkle with powdered sugar
11. Serve with warm maple syrup (I don't do the syrup part)
- Crack eggs & get them started (on low)
- Melt butter in microwave
- Add brown sugar & stir together


- Pour mixture into 9 x 13 pan
- Spread evenly to cover bottom of pan


- Add milk & vanilla to egg mixture
- *Add 1 Tablespoon powdered sugar to egg mixture*
- Spread even layer of Texas Toast on butter/sugar layer
- *I cut off the crusts...this is NOT necessary....I just think it looks nicer...it was for a bridal shower*-

- After you have 1 even layer, ladle on 1/2 of egg mixture


- *Sprinkle brown sugar & cinnamon before next layer*
- Spread second layer of Texas Toast


- *Spread thin layer of butter*


- *Sprinkle lightly with white sugar & cinnamon*
(I think the butter & sugar help give the final product a crusty top....I could easily be wrong....but it sure doesn't hurt the flavor....and since this recipe is far from figure friendly...then why not?)
- Refrigerate overnight

- Bake at 350 for 45 minutes
- Sprinkle with powdered sugar
- Top should be crusty, middle should be soft & moist, & bottom is just glorious!

- The recipe calls for eating it with warm maple syrup. I did not do this....it would be way too sweet....instead, I added the Tablespoon of powdered sugar in the egg mixture.
- I personally feel that eating it upside down is the way to go.....that way you don't waste any of the sticky bits of heaven on the plate


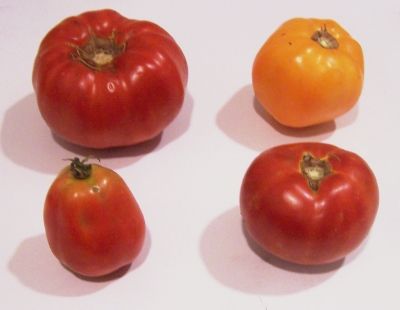 u-own farm is the place to go! Below are 4 common varieties that will work:
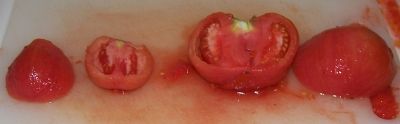
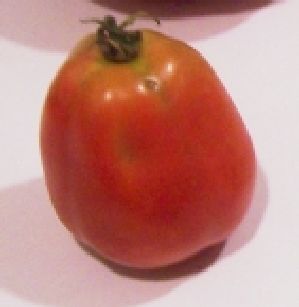 The picture at right shows the best variety of tomato to use: Roma; also called paste tomatoes. They have fewer sides, thicker, meatier walls, and less water. And that means thicker sauce in less cooking time!
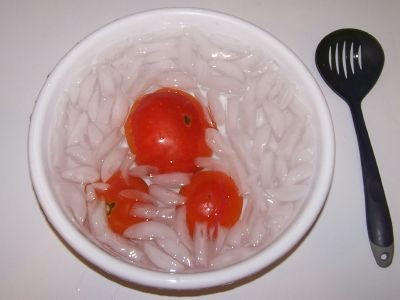
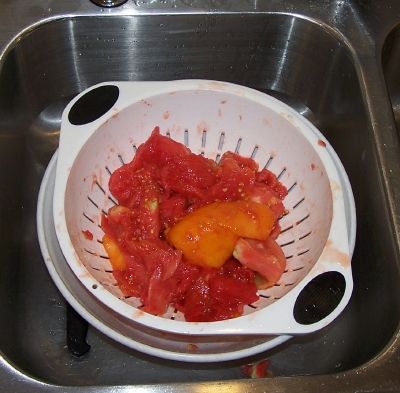 Toss the squeezed (Squozen? :) tomatoes into a colander or drainer, while you work on others. This helps more of the water to drain off. You may want to save the liquid: if you then pass it through a sieve, screen or cheesecloth, you have fresh tomato juice; great to drink cold or use in cooking! By draining the water off now, you'll end up with a thicker spaghetti sauce in less cooking time! And that preserves vitamins (and your sanity).
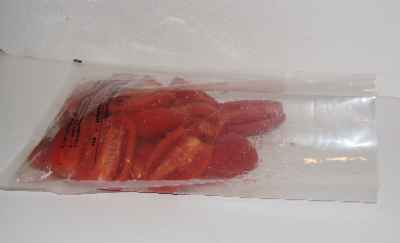
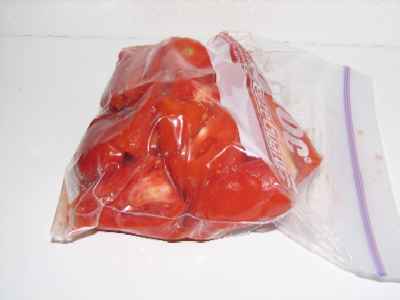
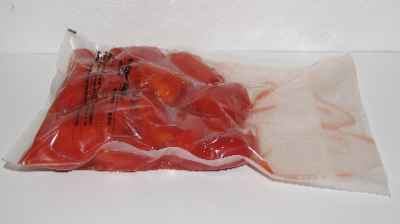 Obviously if you haven't got a vacuum food sealer, just inspect the bags and you may need to open them and reseal them to eliminate any air pockets!
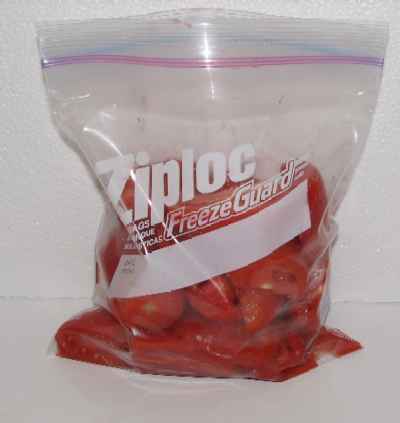 Pop them into the freezer (on the quick freeze shelf, if you have one). Now leave them for 2 or 3 hours till frozen.