Tuesday, March 20, 2012

Easter Egg Garland


Years ago, my step daughter made me a big egg and left part of it open so she could put in grass and Easter candies. It was so pretty and colorful! I just loved it! Here are some pictures that were on another blog and instructions how to make them. Hope you like them!

Make a stiffener mixture. I used 1 cup of liquid starch mixed with a half cup of flour. You could double or triple this recipe if you’d like.  I did.
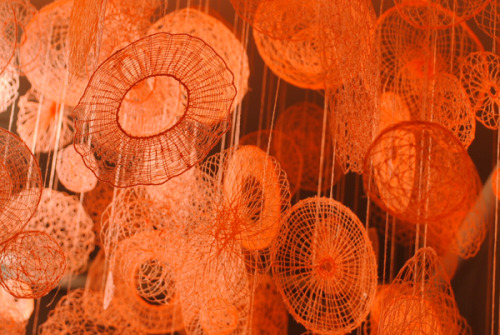
 Next I got some string, I used embroidery floss. You could also use pearl cotton thread or crochet thread.
Then you stick your string in a bowl of starch goo, but don’t just plop it in there like I first did. Your string WILL get into a knot… and it’s not fun to try and un-snarl gooey string.  So don’t do it. Instead coil your string into the mixture and gently press it into the goo, I didn’t get one knot doing it this way. 
 
For a little egg, blow up a water balloon and wrap the gooey string around the balloon. Make sure you wipe off the excess goo and let it fall back into the bowl, it doesn’t need to be drippy.
One skein of embroidery floss was just enough for one water balloon sized egg.
It’ll take several hours for it to dry. Once it dries, pop the balloon. You might have crusty stuff in-between the string, I scraped that out with a straight pin. 
But then I decided to thread the eggs onto some more embroidery floss and made a garland out of them. You’ll need a fairly big needle to do this.
I threaded it  at about 1/4th of the way down from the top of the egg. To keep them in place, I hot glued the eggs to the string. Here is the link of the blog: http://www.craftyendeavor.com/2012/03/08/easter-egg-garland/

She also made some different size eggs.


Monday, March 19, 2012

10 Easter Eggs Decorating Ideas

Here are some pictures of Easter egg decorating ideas. They did not give a tutorial but look easy to figure out. Anyway, you can look at these pictures and create your own.


decorative easter eggs
Photo credit: Wish on a Whisker
decorative easter eggs
Photo credit: Rafał Wójcik
decorative easter egg
Photo credit: DyeDye

Photo credit: dotcomwomen
easter egg

Sunday, March 18, 2012

Fragrant Fruit Wreath - can you just smell it?

Turn dried oranges and lemons into a circle of refreshing color. Although this wreath has evergreen and Christmas balls in it, I would replace them with Easter eggs and pastel ribbons to make it for Easter.


What You'll Need 6-inch round florist's foam wreath 
  • 14 oranges 
  • 8 lemons 
  • Serrated knife 
  • Straight pins 
  • Evergreen sprigs or spring flowers
  • Three small holiday balls or plastic Easter eggs
  • Ribbon 
How to Make It


1. Cut oranges and lemons into 1/8-inch-thick slices. Places slices in a 150° F oven on an open rack to dry the slices. Leaves the slices in the oven for 3 hours, turning them over after 90 minutes. (Edges should not be brown.)


2. When fruit is dry but slightly moist, remove from oven and place on wire rack; air dry for 3 hours. If wreath form has flat edges, use a serrated knife to gently round.


3. Use straight pins to attach the fruit slices to the wreath, overlapping the pieces to cover the entire foam wreath.


4. Wire sprigs of greenery together, then secure the bundle to the wreath top. Wire a few holiday balls and ribbon to the greenery.

Here is the link: http://www.bhg.com/christmas/wreaths/fragrant-fruit-wreath/

DIY: SIMPLE & STUNNING LIVING SUCCULENT WREATH

This is such a great idea! It is a living wreath of plants. It is fairly easy and not that expensive. You can use supplies you already have around the house.

The tutorial has many pictures so rather than copying the entire tutorial, here is the link: http://prudentbaby.com/2010/12/prudent-home/diy-simple-stunning-living-succulent-wreath-2/

Thursday, March 15, 2012

Drawing made out of thread by Amanda McCavour

Here is another drawing made from thread on fabric that disappears in water. This just amazes me! Amanda McCavour is definitely artistic! What do you think?


 farewell-kingdom:
Drawing made out of thread by Amanda McCavour

Amanda McCavour's Thread Drawings

I found this so interesting. Amanda McCavour makes these with her sewing machine, threads,  and fabrics that dissolves in water. Who would have thought? Anyway, these pictures represent her living room. Don't you just love these? I sure do!


amanda-mcavour-1.png
Amanda-McCavour-2.jpg
Amanda McCavour creates incredible images with thread. She describes how she does it on her website:
In my work, I use a sewing machine to create thread drawings and installations by sewing into a fabric that dissolves in water. This fabric makes it possible for me to build up the thread by sewing repeatedly into my drawn images so that when the fabric is dissolved, the image can hold together without a base. These thread images appear as though they would be easily unraveled and seemingly on the verge of falling apart, despite the works actual raveled strength.
The images above are from an installation called "Living Room," in which McCavour made life-sized drawings of all the stuff she once had in her living room.

Tuesday, March 13, 2012

Tracing Paper Dolls for the Silhouette to Print and Cut


Tracing Paper Dolls for the Silhouette to Print and Cut


I saw this tutorial and just thought it would be so neat for my granddaughters. They love the "princesses" and would love playing with these. I didn't copy all the steps because it is a little long. You can go here: http://findingtimetocreate.blogspot.com/2011/03/tracing-paper-dolls-for-silhouette-to.html to see the entire tutorial.

Tuesday, March 06, 2012

Easy Cheese Danish


This recipe is just SO good and it is easy!!! You just have to try it. I got the recipe from http://kitchengirljo.blogspot.com  and made it the other day. My husband just loves it. Everyone who eats it, just loves it. I love it!

You can go to the link: http://kitchengirljo.blogspot.com/2009/07/easy-cheese-danish.html or just see the recipe below:

Ingredients:
2 cans ready to use refrigerated crescent rolls
2 8-ounce packages cream cheese
1 cup sugar
1 teaspoon vanilla extract
1 egg
1 egg white

Glaze:
1/2 cup powdered sugar
2 Tablespoons milk
1/2 teaspoon vanilla extract

Method:
Preheat oven to 350* degrees and grease a 13X9-inch baking pan. Lay a pack of crescent rolls in the pan and pinch the openings together. Beat the cream cheese, sugar, vanilla, and egg together until smooth. Spread the mixture over the crescent rolls evenly and then lay the second pack of crescent rolls on top of the cheese mixture and brush with egg white. Bake for 35-45 minutes until the top is golden brown. Top with glaze after cooling for 20 minutes.

Kitchen Notes from the blog:
I have made this danish using low fat cream cheese and splenda (sugar substitute) and it was delicious! Also, the amount of filling the original recipe calls for makes a VERY heavily filled danish. I have halved the filling using 1 package of cream cheese, 1/2 cup of sugar, 1 whole egg, and a 1/2 teaspoon of vanilla extract and it was still very good. If you use the half filling method, bake for closer to 30-35 minutes.

Friday, March 02, 2012

Reusable Shopping Bag


Reusable Shopping Bag

This is a tutorial from the


View Project Details : Reusable Shopping Bag

Reusable Shopping Bag

Design by:Lisa Atwood
Date:2010-07-08 21:38:13
Category:Crafts
Skill level:Intermediate
Time:1 hour

Instructions
  1. Country Life cartridge
    • 2 ½" FRESHLY PICKED
    • 7" sunflowers and layers
  2. Iron Wonder Under to back of fabrics.
  3. Layer and iron on bag as shown. Embellish with button.
What You Will Need
  1. Cricut Expression® Personal Electronic Cutter
  2. Cricut® Country Life cartridge
Other Supplies
  1. Felt bag
  2. Fabric: yellow, green, dark green,
  3. Heavy Duty Wonder Under
  4. 3 Buttons
  5. Iron and ironing board

Bunny Bag Tutorial


Bunny Bag Tutorial

This is a great Easter gift that you can make for your children or grandchildren. It's a bunny bag. This is the site that you can go to for the tutorial: http://www.red-brolly.com/red-brolly/2011/03/its-bunny-time.html